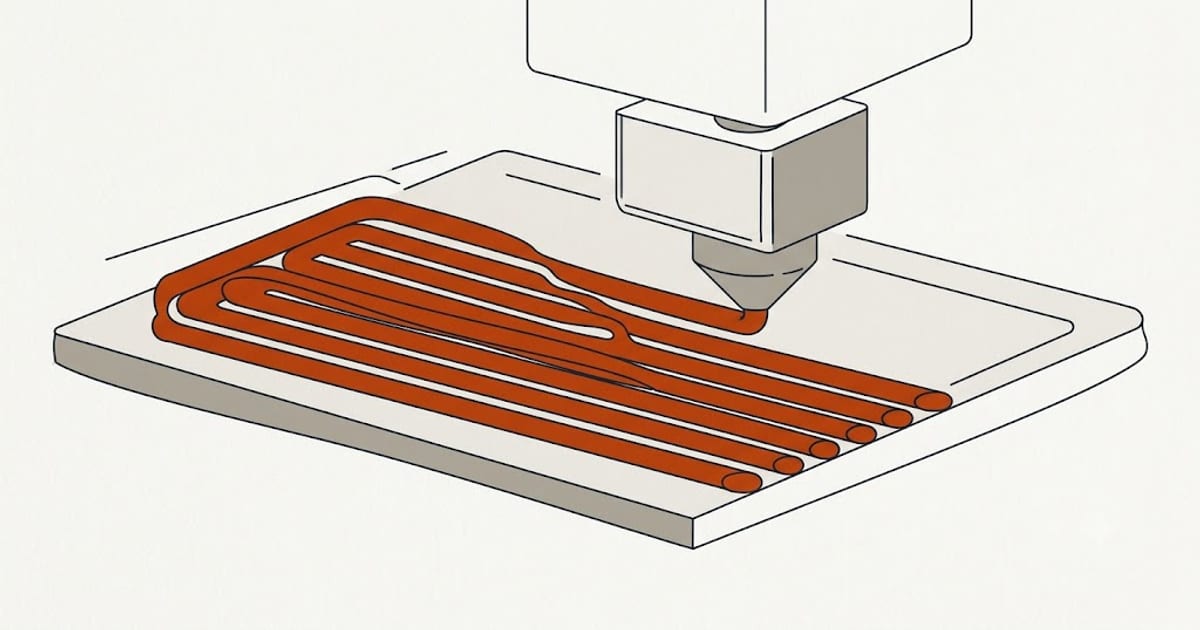
A print that fails at layer 40 usually failed at layer 1. The first layer is where the part decides whether it is attached to the world, and it is governed by five settings that people tend to change all at once.
Here is what each one actually does, and which of them you should be adjusting.
1. Nozzle height — the only one to set by eye
Everything else on this list has a defensible starting number you can copy. This one does not, because it depends on the exact distance between your nozzle tip and your build surface, which is a property of your machine on this particular day.
The setting is called Z-offset, live Z, or baby stepping depending on your firmware. What it controls is how hard the first layer is pressed into the plate — the squish.
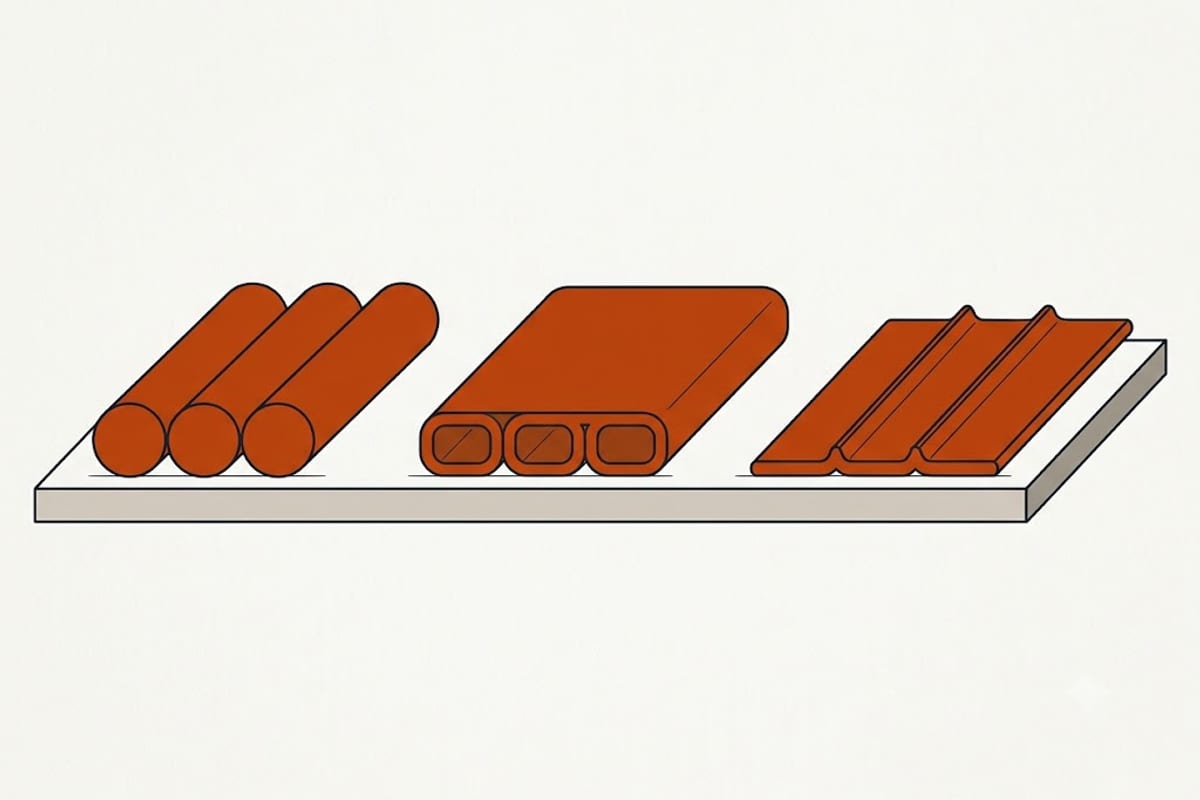
Read your own first layer against those three states:
- Round, separate lines with gaps down to the plate — nozzle too high. The lines are being placed rather than pressed, and each one only touches its neighbours at a tangent. This layer will peel.
- Flat lines merged into a continuous sheet, no gaps, no ridges — correct. The extrusion is being squashed just enough to fuse sideways as well as downward.
- Very thin, very wide lines with raised ridges between them — nozzle too low. You are ploughing material rather than laying it, and the ridges are the excess with nowhere to go. This causes elephant's foot and, over time, gouged build sheets.
Adjust in 0.02–0.025 mm steps while the first layer is printing, and judge the surface, not the adhesion. A too-low first layer sticks beautifully and is still wrong.
2. First layer height — thicker than the rest
Set it to roughly 0.2–0.3 mm even if the rest of the print runs at 0.12 mm.
A thicker first layer gives the extrusion somewhere to go when it meets a plate that is not perfectly flat. On a bed with 0.1 mm of variation across it, a 0.12 mm first layer will be crushed at the high spots and floating at the low ones. A 0.25 mm first layer absorbs the same variation without either failure.
This is also why a thick first layer papers over a mediocre bed levelling job — which is fine as a workaround and bad as a permanent answer.
3. Speed — slow, and slower than you think
20–25 mm/s, against the 50–300 mm/s the same filaments are rated for in the body of the print.
Two reasons. Moving slowly gives the extruded plastic more contact time against a surface it needs to bond to and more time to conduct heat away from the nozzle into the plate. And it gives you time to watch the layer go down and correct the Z-offset before the layer is finished.
The first layer of a typical part takes under two minutes even at 20 mm/s. There is nothing to save here.
4. Temperature — a little hotter
Add about 5 °C to your nozzle temperature for the first layer only.
The first layer is the only one being extruded onto cold metal rather than onto warm plastic, so it loses heat far faster. The extra 5 °C compensates. Beyond that you gain nothing and start risking the extrusion sagging outward at the edges before it sets.
Bed temperature does not want a first-layer boost — see PLA bed temperature for why raising it usually backfires.
5. Cooling — off
Every one of the four major PLA brands publishes 100 % cooling fan for the body of the print. All of them assume it is off for the first layer.
Part cooling is there to freeze each layer fast enough to hold its shape. On the first layer that is exactly the wrong goal: you want the plastic to stay molten long enough to bond to the plate. Running the fan on layer 1 is one of the more common causes of a print that lifts at the corners on an otherwise well-configured machine.
Turn it on gradually from layer 2 or 3 rather than all at once.
Brim, raft, or neither
Prusa's own data sheet for Prusament PLA says it plainly: "The brim is not necessary in general." For PLA on a working surface, that is true.
- Neither is right for most parts with a reasonable footprint.
- A brim earns its place on tall parts with a small base, where the issue is leverage rather than adhesion, and on parts with sharp corners that concentrate peeling force.
- A raft is almost never the answer for PLA. It costs material and time, and it usually indicates a levelling problem that will come back on the next print.
The order to fix things in
When a first layer fails, change one thing at a time in this order:
- Clean the plate. Dish soap and warm water. Skin oil defeats PEI entirely, and isopropyl alcohol spreads it rather than removing it.
- Re-level, then set Z-offset by eye against the three states above.
- Slow to 20 mm/s and confirm cooling is off for layer 1.
- Then touch temperatures.
Most people work that list backwards, which is why so much first-layer troubleshooting ends in a shrug.
If the layer looks right and the rest of the print is the problem, the issue is elsewhere — nozzle temperature for weak layers, stringing for surface strands.
FAQ
What first layer height should I use for PLA?
Around 0.2–0.3 mm, regardless of the layer height used for the rest of the print. A thicker first layer absorbs small variations in bed flatness that a thin one cannot.
How slow should the first layer be?
20–25 mm/s. That is well below the 50–300 mm/s these filaments are rated for in the body of a print, and it costs under two minutes on a typical part.
Should the cooling fan run on the first layer?
No. Part cooling helps every layer except the first, where you want the plastic to stay molten long enough to bond to the plate. Bring the fan in from layer 2 or 3.
Why does my first layer stick but come out rough?
Almost always a nozzle set too low. The lines are being ploughed rather than laid, forcing excess material up into ridges between them. It adheres well and is still wrong — raise the nozzle in 0.02 mm steps until the ridges disappear.
Do I need a brim for PLA?
Usually not. Prusa's data sheet for Prusament PLA states the brim is not necessary in general. Add one for tall parts on a small footprint, where the problem is leverage rather than adhesion.